Author Archives: Zach Heilman

Installing VMware Tools

VMware Tools is a package that can be installed on your Windows and Linux/BSD VMs that improves their performance, especially in graphics and networking.

Installation in Windows guests

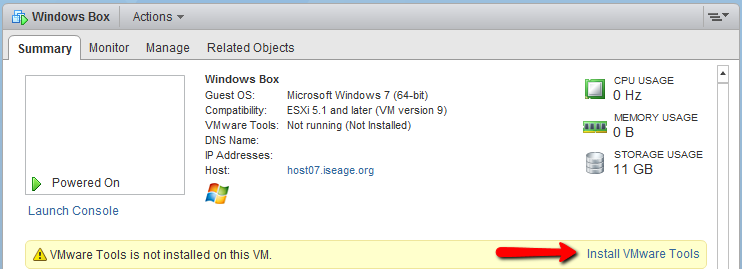
Select the VM, and on the “Summary” tab you will see an option to install VMware Tools:

tools

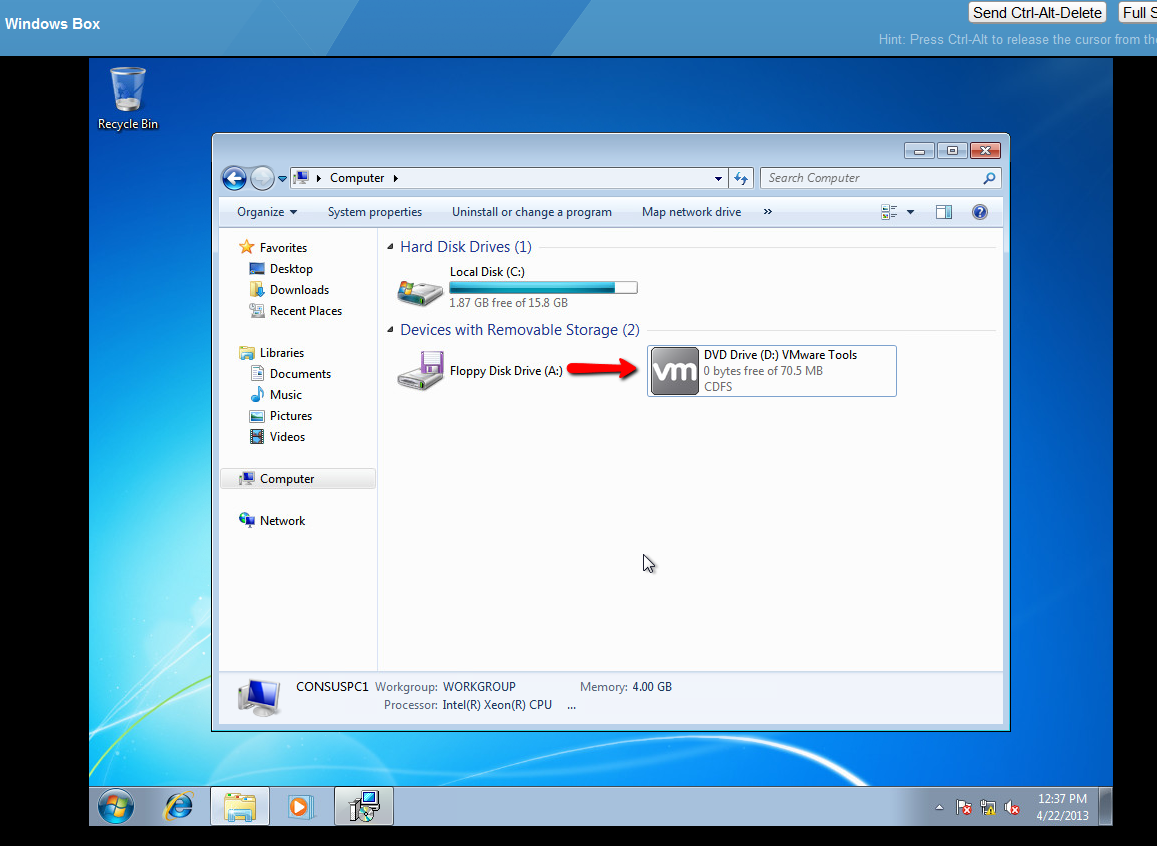
This will mount the CD image for you.

In the guest,  simply open up the CD drive and run the setup executable.

tools1

Generally, it’s safe to accept the default options. You’ll need to reboot once the installation is finished.

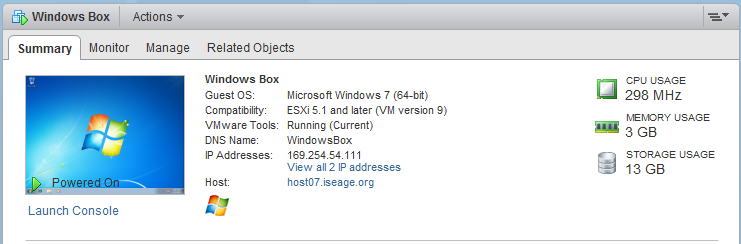
You’ll notice that the IP address of the VM now becomes visible in the Web Client, as well as some information about its resource usage:

tools2

Installation in Linux/BSD guests

Via the open-vm-tools package

VMware recommends you install the open-vm-tools package provided by your distribution, if it exists.

  •  Debian/Ubuntu:
  • apt-get install open-vm-tools
  • Fedora/CentOS:
  • yum install open-vm-tools
  • openSUSE:
  • zypper install open-vm-tools
  • BSD:
  • pkg install open-vm-tools-nox11 (for systems without a GUI)
    
    -- or --
    
    pkg install open-vm-tools (for systems with a GUI)

Manually from CD

Mount the CD by clicking “Install VMware Tools” as in the installation for Windows guests. You’ll probably need to install some packages to satisfy VMware Tools’ dependencies.

At minimum you will need:

  • Perl (installed by default on many systems)
    • Debian/Ubuntu (usually already installed):
      apt-get install perl
    • Fedora/CentOS (usually already installed):
      yum install perl
    • openSUSE (usually already installed):
      zypper install perl
    • BSD:
      pkg_add -r perl5
  • C compiler and appropriate header files
    • Debian/Ubuntu:
      apt-get install build-essential
    • Fedora/CentOS:
      yum groupinstall "Development Tools"
    • openSUSE:
      zypper install -t pattern devel_C_C++
  • Kernel header files
    • Debian:
      apt-get install linux-headers-$(uname -r)
    • openSUSE:
      zypper install kernel-devel
  • In FreeBSD guests, you will also need the “compat6x” package:
    pkg_add -r compat6x-i386 (32-bit)
    
    --or--
    
    pkg_add -r compat6x-amd64 (64-bit)
    

Now mount the CD drive. If your *nix installation has a GUI, this should be done automatically for you. Otherwise, run the following as root:

  • Linux:
    mount /dev/cdrom /mnt
  • BSD:
    mount -t cd9660 /dev/cd0 /mnt

Now copy the file to a temporary location, extract it, and run it:

cp /mnt/VMware-Tools*.tar.gz /tmp/
cd /tmp
tar -zxf VMware-Tools*.tar.gz
cd vmware-tools-distrib/
./vmware-install.pl

The installer will ask you a series of questions; accept the default options if you aren’t sure.
Once the installer is done, reboot.

ITOCDC13: Shell Server and the Service Scanner

Some of you may have noticed this error on IScorE:

ssherror

IScorE’s scanner is only compatible with SSH version 2. In order to remedy this you’ll need to edit your SSH config file (most likely /etc/ssh/sshd_config). Make sure the Protocol directive is set to 2 and the HostKey lines are uncommented (comments begin with a # symbol), as shown below:

sshd

Afterwards, restart the SSH daemon by issuing “service ssh restart” as root. (Note: this command may vary by platform. If nothing else, rebooting the server will apply the changes).

Introducing the vSphere Web Client

Some teams have been experiencing some issues with editing the settings of your VMs. We’ve been trying to nail down the root cause, but in the mean time we’ve come up with an alternate solution: introducing you to the vSphere Web Client.

webclient

So far you’ve been using the desktop-based VMware vSphere Client to log in to vCenter. There is another method for access: the vSphere Web Client, the icon for which you can find on the desktop of the RDP hop. The Web Client is new to ISEAGE this year, and will eventually become the main method of accessing vCenter as the original vSphere Client is slowly deprecated. More importantly for our purposes, it has far fewer issues with permissions.

As with the vSphere Client, you can check the box to automatically use your CDC credentials, and you’ll need to ignore the certificate error. The Web Client also has some new features not found in the old vSphere Client, so we encourage you to familiarize yourself with it; when you arrive on-site, you will be able to access the Web Client directly on your laptops.

NCDC13 Original Images now available!

The four provided images are now available for download. Keep in mind these images have vulnerabilities and should not be run in sensitive environments!

NCDC13_Web | NCDC13_Shell | NCDC13_Exchange | NCDC13_DC

These files are also mirrored here.

The VMs can be run using the free VMware Player or the non-free VMware Workstation, which may be provided by your academic institution. If you’d like to run these on a local ESXi server instead, grab VMware vCenter Converter Standalone to convert them to the correct format. (You’ll need to register a free account with VMware to download ESXi and vCenter Converter).

NTP Server Now Available

Is the white team running an NTP server available to the blue teams to use? This would help us coordinate our logs, events and activities with white teams records of events.

Yes! An NTP server is now available at time.cdc.net, or 199.100.16.100 (the proxy server).

On Windows, right-click the clock, choose “Adjust date/time”, then click on the “Internet Time” tab.

On *nix systems, install ntpdate to easily synchronize with our server:

ntpdate time.cdc.net

You can also install an NTP daemon to sync automatically upon startup. See the documentation associated with your distro for more information.

Shell Server Test Script now available!

The script to test your shell server is now available from inside the ISEAGE network at http://blue.cdc.net/compile_test.sh

You can grab and run this easily via command line (assuming you’ve set up your network interface properly):

wget http://blue.cdc.net/compile_test.sh
chmod +x compile_test.sh
./compile_test.sh

Please note the difference between the java runtime (java) and java compiler (javac), as you will need both to function correctly!

The script automatically generates and deletes source files to run its tests. If you’d prefer to use these files for troubleshooting, simply set the PRESERVE variable near the beginning of the script to 1.

If you’d like to examine it on your local machine, it is also available here: compile_test.sh_.txt Remove the “_.txt” ending before running it.